Gluten Free Croissants
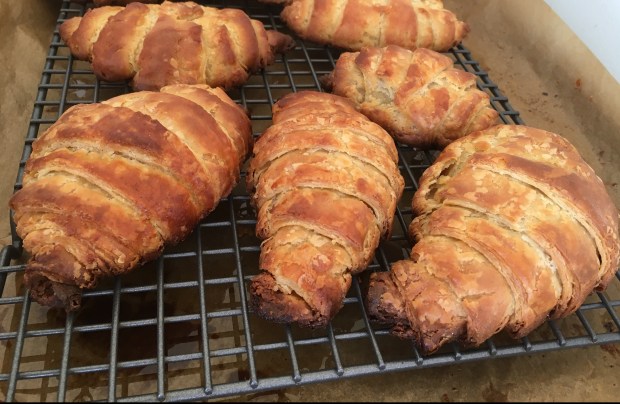 Not easy, but doable! Because this was pretty successful, and there were a number of things stacked against me:
- I have never made puff pastry before – even the gluten kind (although I have watched enough Great British Baking Show to think I know what I’m doing…)
- I have never made anything with GF flour and yeast… maybe should have started with biscuits?
- I don’t have a mixer. This makes it difficult when the recipe says things like, “mix until the dough comes together away from the sides and begins to form a ball or lump in the middle of the mixer”…. I used my hand for this part, so not at all sure the dough achieved the right consistency…
- “Gluten Free Croissant” is considered by many to be an oxymoron… in fact, the whole impetus for this fools errand began because a friend thought it was laughable that I thought I could make anything with gf puff pastry, and I got offended – and determined!
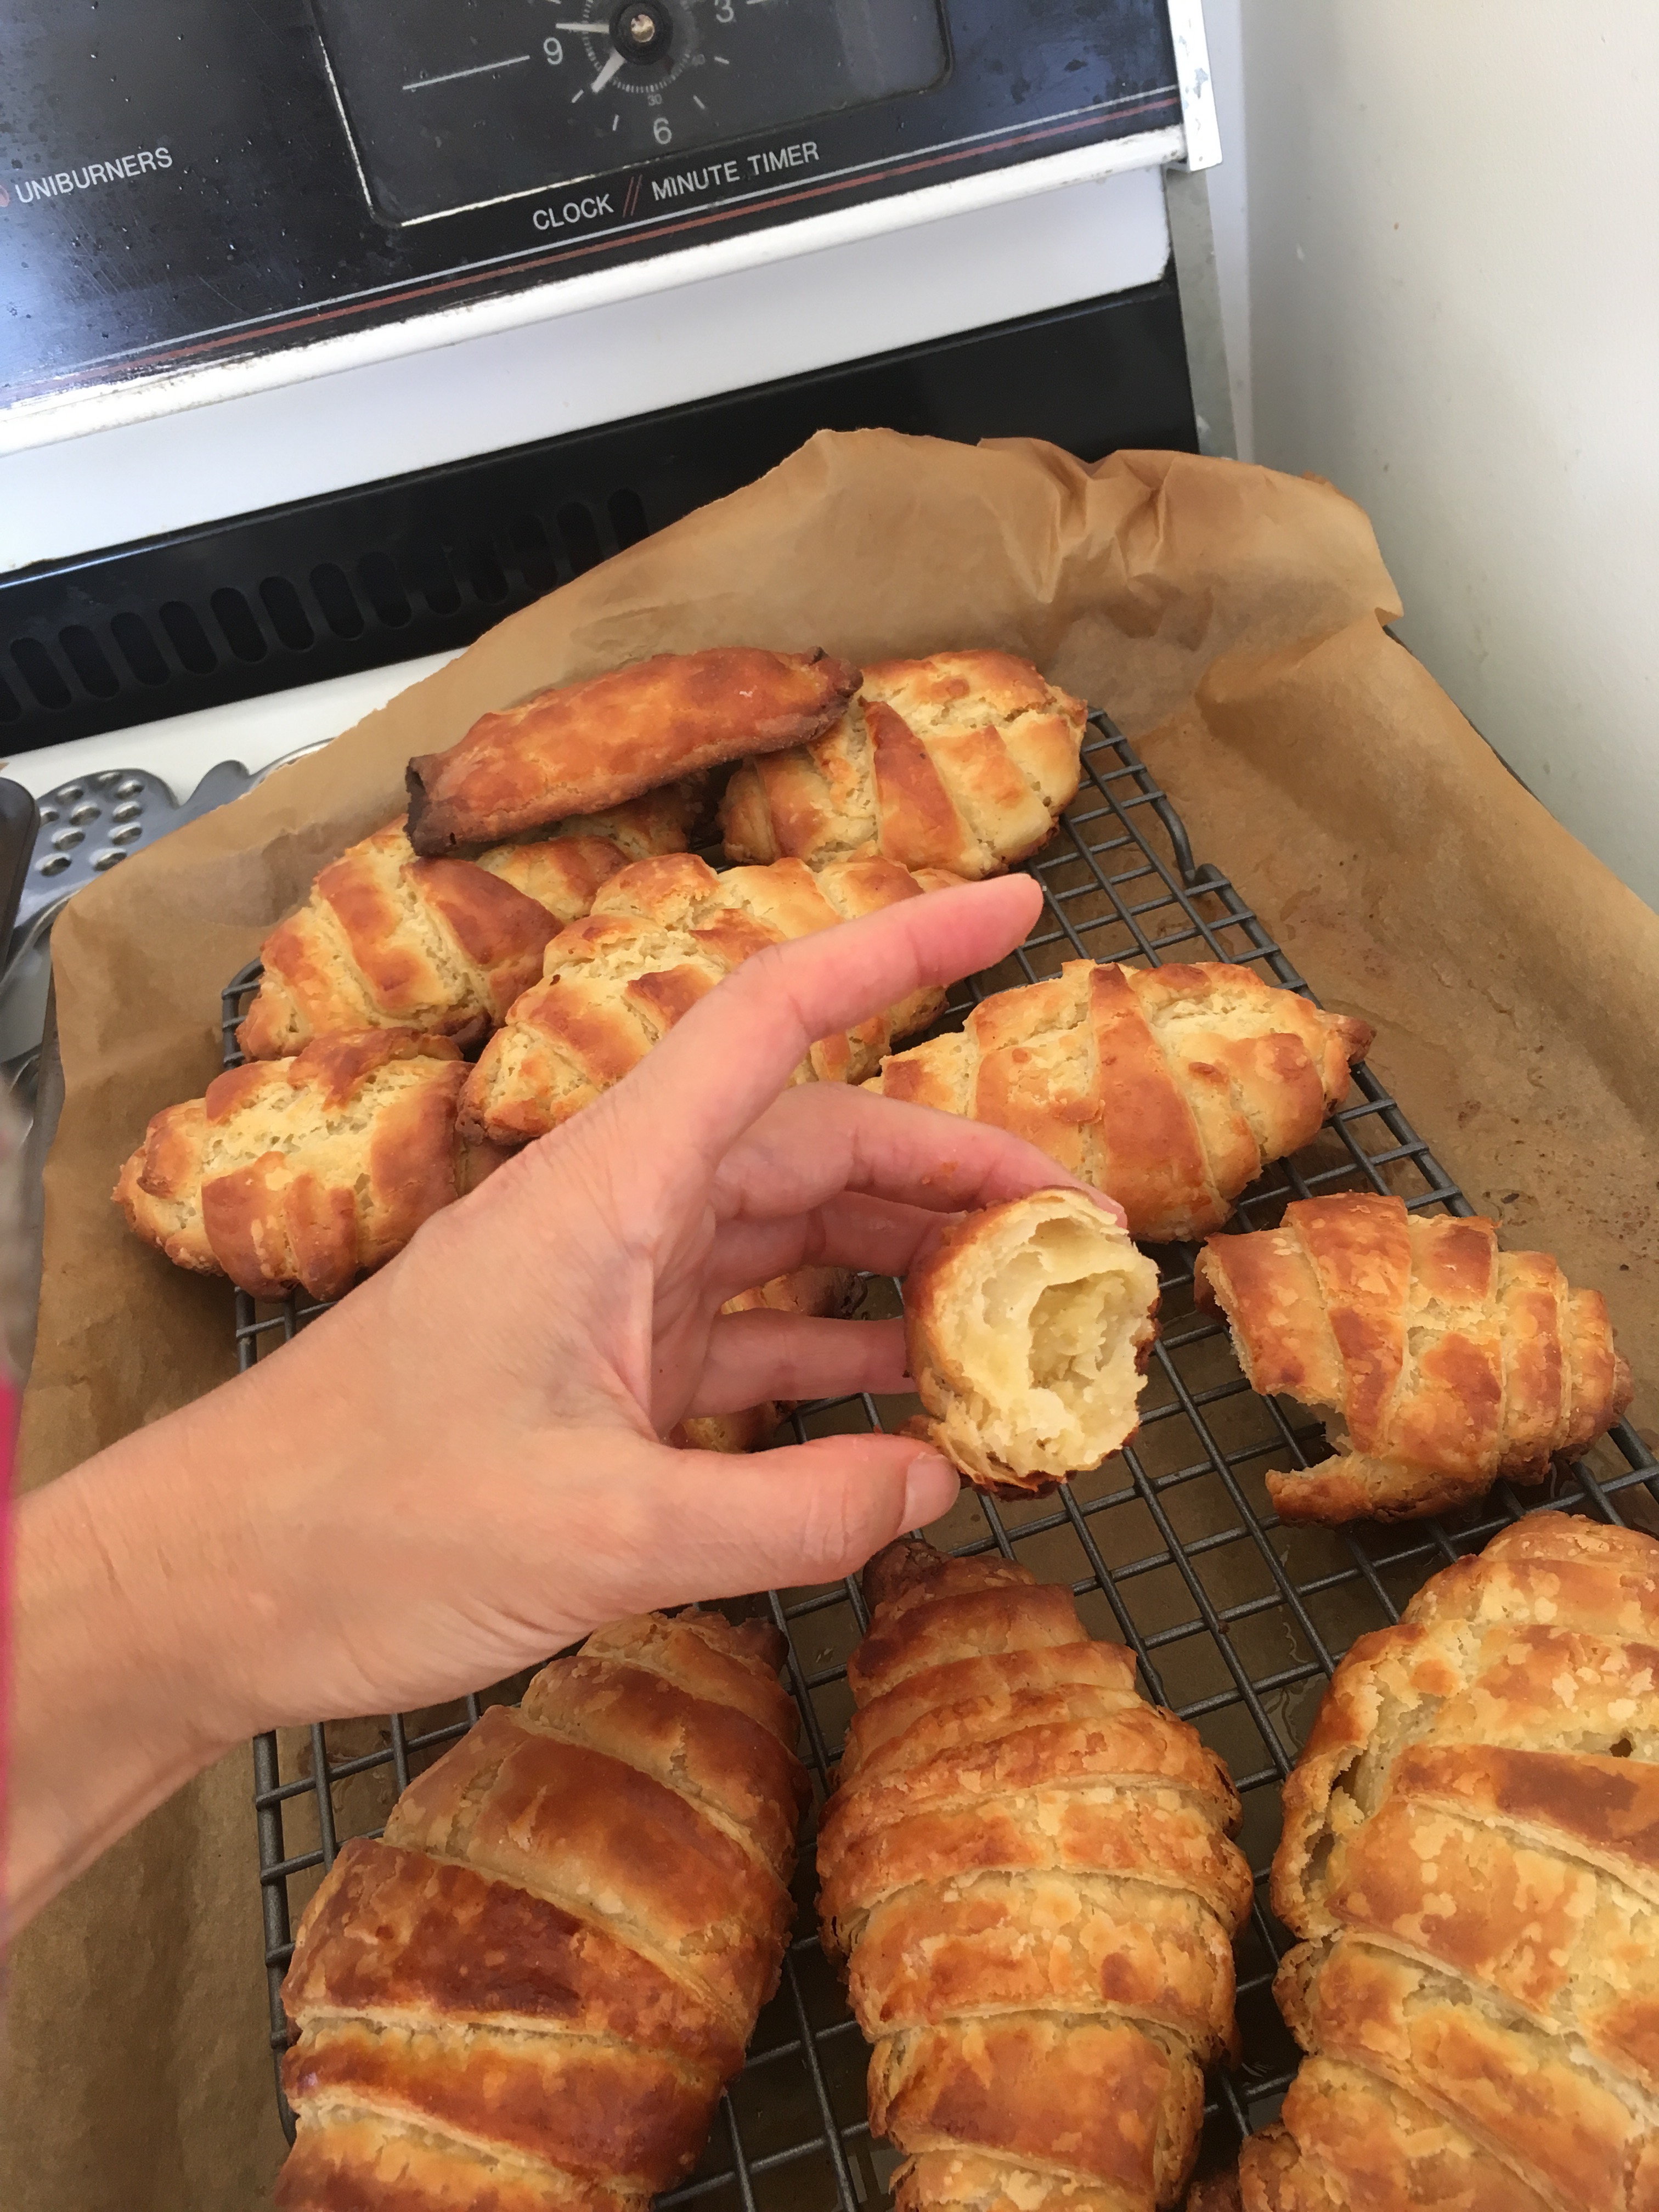
Anyway, following this recipe from Better Batter perhaps a bit more closely than usual, we have arrived!
Here’s the journey and a few callouts along the way:
1) PREP DOUGH AND BUTTER
Step 1: Place 1pkt Yeast+1/4c warm water+1/4c sugar in a bowl. Let sit for 10 min in a warm place (like on top of a preheating oven for something totally unrelated to these croissants)
- Not sure if you’re supposed to stir this… the yeast that was close to the water puffed up nicely, but the yeast on top stayed pretty dry, and the sugar didn’t totally dissolve in the water so there was a gritty syrup at the bottom.
Step 2: Mix 2 sticks butter+3/4c sour cream+3/4c ricotta+1egg until it’s kind of like cottage cheese. Then mix in the yeast mixture.
- Not having a mixer, I used my immersion blender, and then a fork. I think this worked pretty well!
- Also – sour cream and ricotta? who new!! Don’t mind having those leftovers in my fridge…
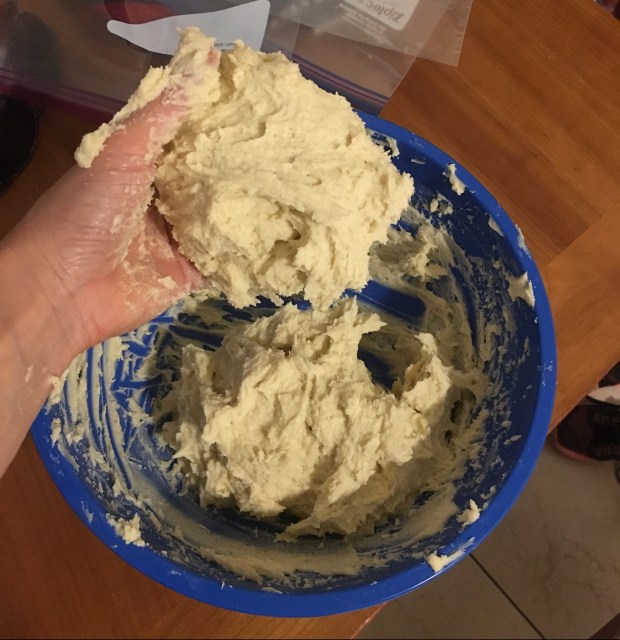
Step 3: Add 2 1/2c gf flour+1tsp each: salt, baking soda, cream of tartar and mix “until the dough comes together… it will be sticky”
- Used my hand for this. It was very sticky. Also fun.
Step 4: Divide in half, place each half in a ziploc bag and shape into a ~4×6″ rectangle. Refrigerate 2hrs-overnight.
- They seem to think you can shape the dough into rectangles first and then put it in the bags, but it was just a goopy mess.
Step 5: Grate 2 sticks of frozen butter and refreeze them.
- Yes that’s right, this recipe ends up using 4 whole sticks of butter (and I actually added a couple extra tablespoons in the end because I didn’t divide it properly when making the puff…) the result came out too buttery for my taste, so many it’d be better with less?
- Also, grating butter is a pain. I tried grating butter that I used with one of the rectangles, and slicing the butter I used with the other. The sliced butter batch didn’t come out as well, but there are other possible reasons for that. On Great British Baking Show they make a rectangle of butter and roll it out with their dough – I would like to try this way next time (if there’s a next time)
2) MAKE THE PUFF
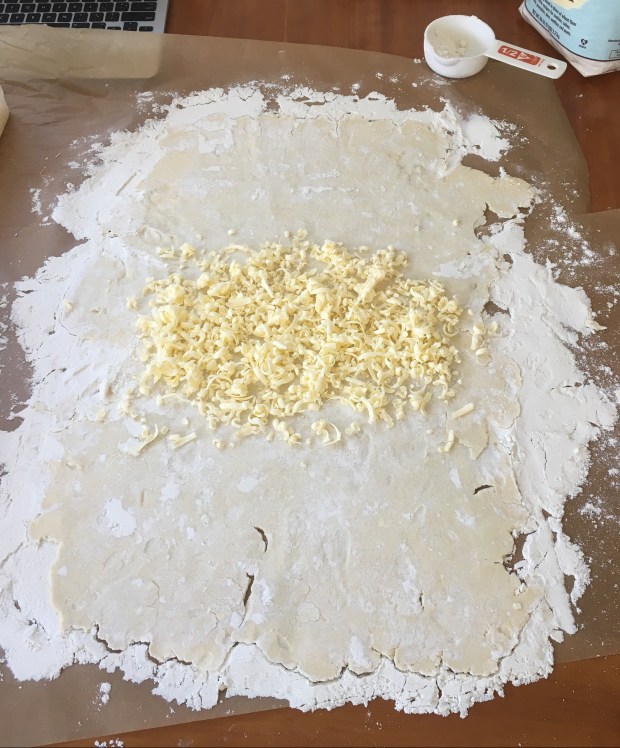
Step 6: Roll out one of the rectangles on heavily floured parchment paper to ~27×15″. Put 2tbsp of the frozen butter in the middle third, fold up the bottom and put another 2tbsp on top of it, and then fold down the top (so there are three layers with butter between each).
- I used too much butter in this step. Also the little butter shavings melt and become impossible to work with, so keep them in the freezer while you’re rolling out.
Step 7: Repeat step 6 – roll it out again, add butter in the middle and fold the bottom up, add butter on top of the fold and fold the top down. Make sure you’re using a lot of flour on top and underneath so that it doesn’t stick*
- *But not toooo much flour – this dough is super crumbly and it would rather crack than stretch while you’re rolling it, and if you use toooo much flour, then dough patches won’t stick when you’re trying to fix the holes…
Step 8: Roll out and fold the same way but without butter
- They say only do this one time, but I’m pretty sure I did it like 4 times…
3) MAKE THE CROISSANTS, ETC
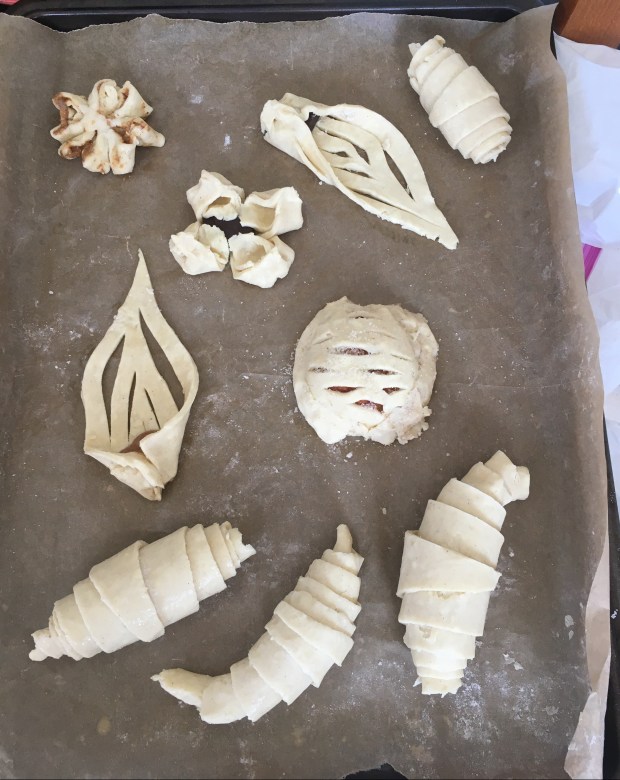
Step 9: Cut the dough into super long triangles, 4″ at one end, and then roll them from the wide end to the point. Use egg white to stick the point to the body, and then brush the whole top with egg white and place on parchment paper on a baking sheet.
- I put chocolate into a couple of these at the wide end, but it didn’t seep out so I have no idea which ones are the chocolate ones.
- I took all the scraps and smushed them into a rectangle that I filled with a little chocolate and made into a pop tart-looking thing. That seemed to come out all right.
Step 10: Let sit for ~30 min in a warm place (like on top of the preheating oven that this time is related to the croissants) and then bake at 415* for ~15-20 min.
- Or, you could decide to go to brunch and leave them for 2 hours. This may have happened with the batch with the cut-not-shredded butter that didn’t turn out as well as the other one, and it may have been for this reason…
Step 11: Repeat steps 6-8 with the second rectangle, but instead of just making croissants, try other fun things you’ve seen people do with puff pastry, like this video I’m obsessed with, because when are you ever going to make puff pastry again, and how cool are these?
- I didn’t have any fruit or jam or chocolate spread, so I used chocolate squares and almond butter. I also didn’t put more butter on the apple cage because there is enough butter already in this situation, and also we don’t have any left.


What kind of flour did you use? Teaching French has made me really, really miss all things gluten especially croissants and baguettes and I’m wondering if these could be made grain free… you should come visit and try it out! 😉
I used Bob’s 1:1 gf flour. I know they have a grain-free blend that maybe would work? If you try it please let me know! And if I try it I’ll let you know 🙂